Upload Data
The Upload Data dialog imports data into the currently selected graph using either Load CSV or Cypher batch mode.
Load CSV flow
Step 1: Upload the CSV file
Choose Load CSV, then select your CSV file.
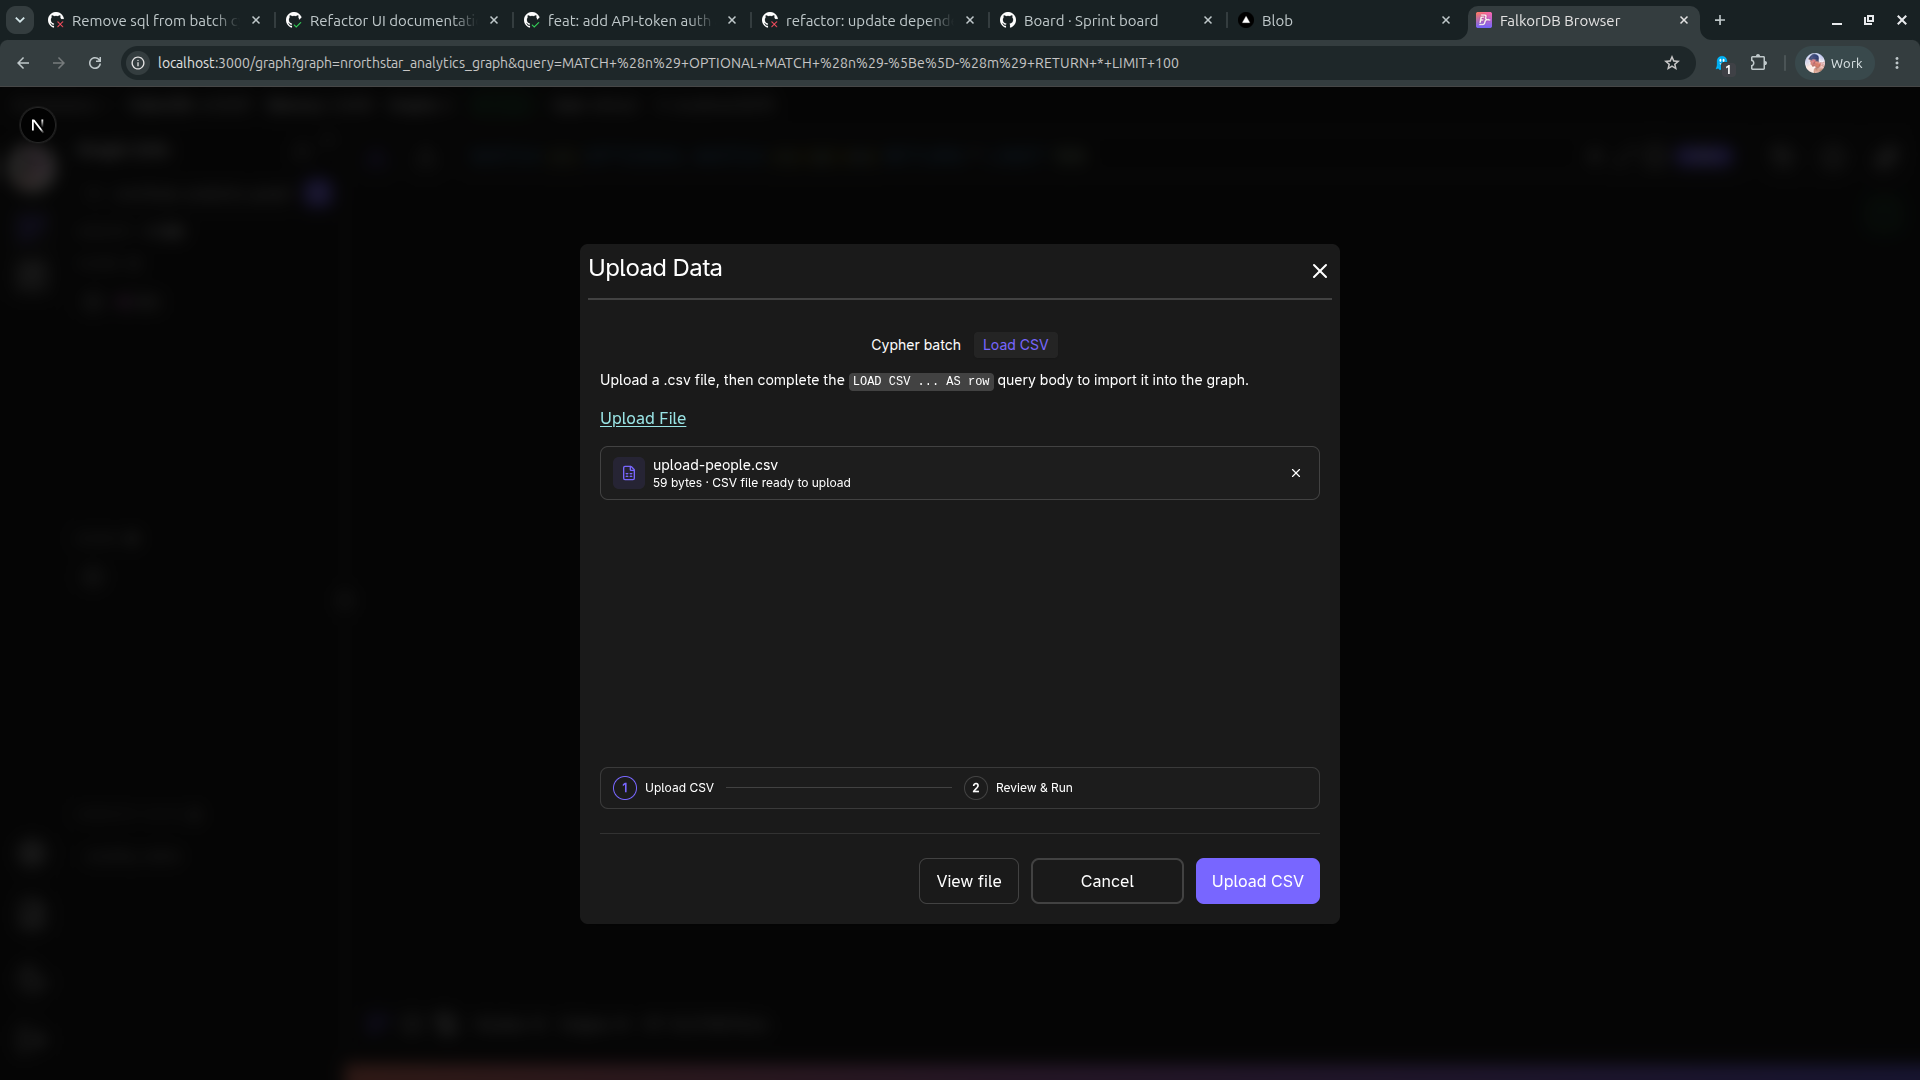
Step 2: Review and run
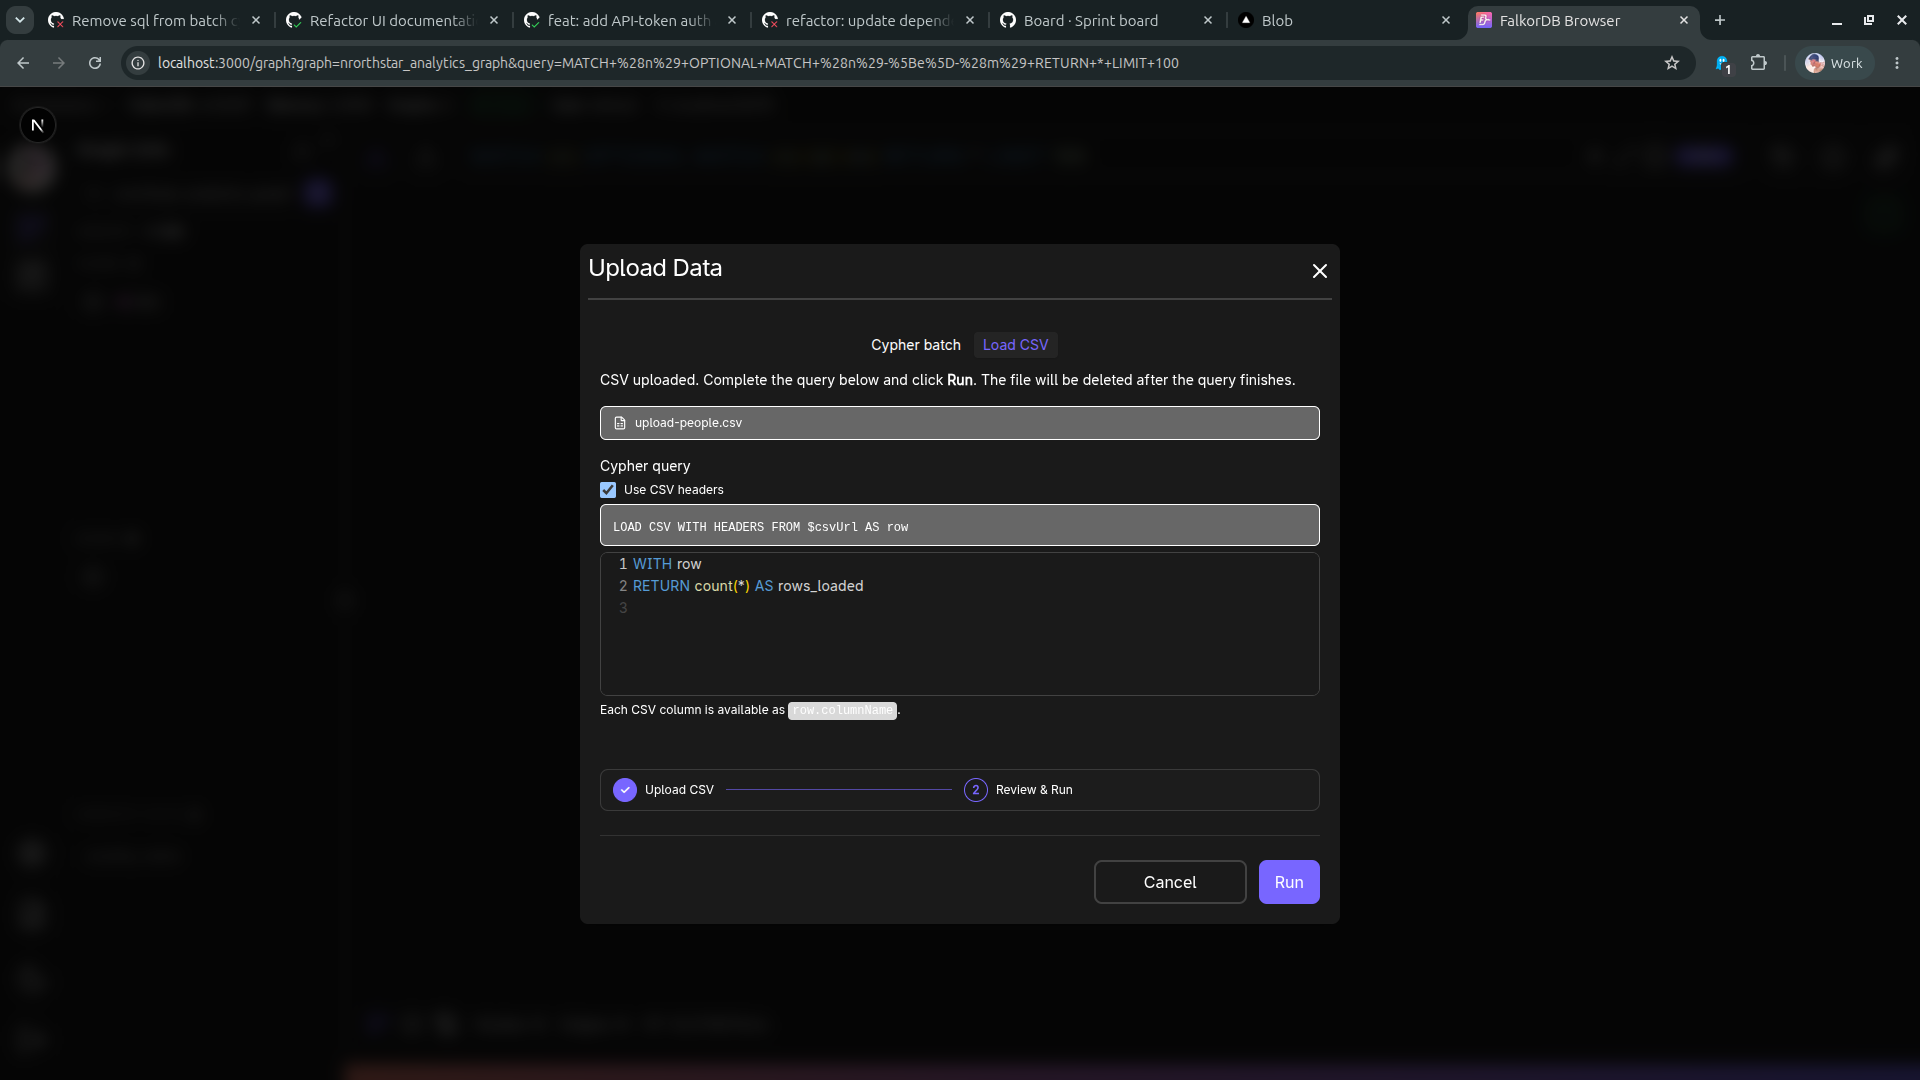
After upload, review the generated LOAD CSV query, adjust it if needed, then click RUN.
Notes:
- Use CSV headers can be toggled to map columns by header name.
- Each CSV column is available as
row.columnNamein the query body. - The uploaded CSV file is temporary and removed after query execution finishes.
Cypher batch flow
Switch to Cypher batch to upload a .cypher or .txt file containing one or more statements.
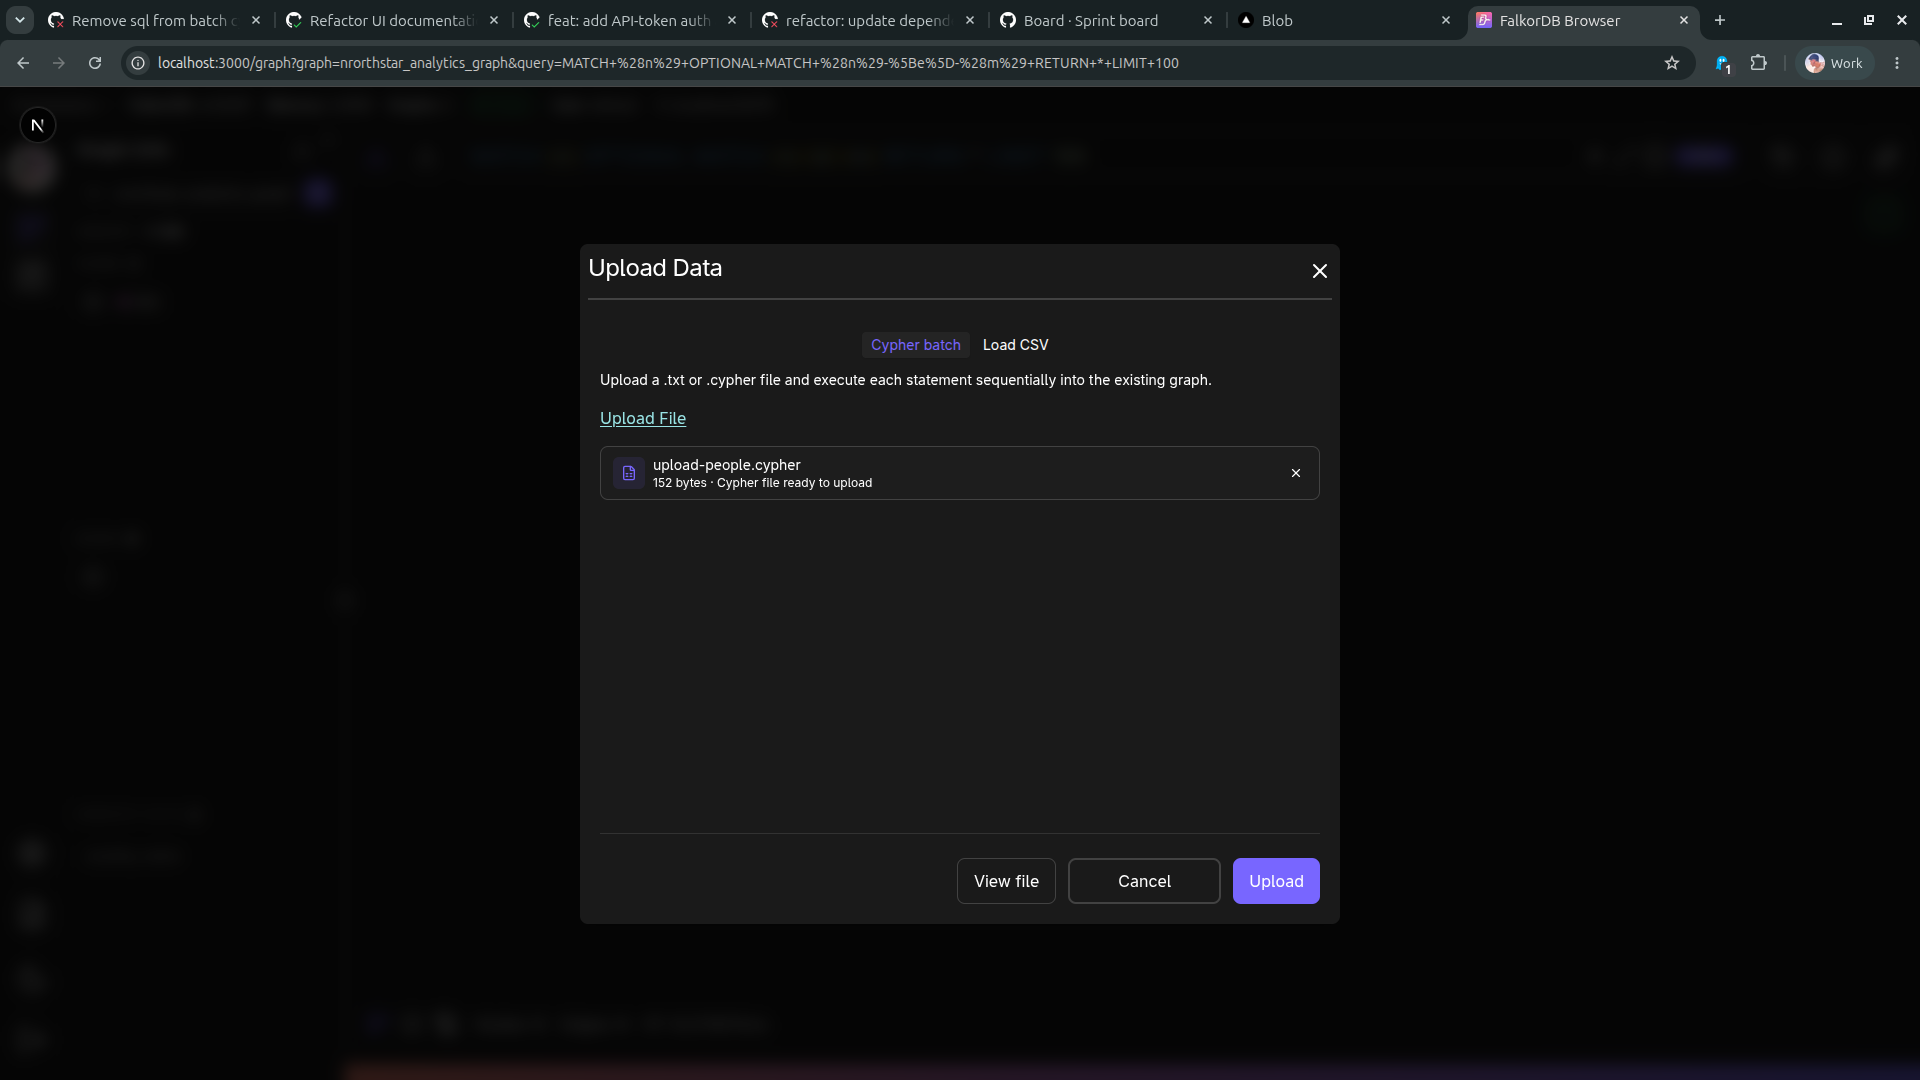
When you click Upload, statements execute sequentially in the active graph.
When to use each mode
- Load CSV: Use this for tabular source data where you need explicit row-to-graph mapping logic.
- Cypher batch: Use this when you already have graph mutations prepared as Cypher statements.
Frequently Asked Questions 4
What file types can I use in Upload Data?
Use .csv with Load CSV, or .cypher / .txt with Cypher batch.
Does Upload Data run on the selected graph only?
Yes. The import runs against the currently selected graph in the Graph page.
Can I edit the generated LOAD CSV query before running?
Yes. After uploading a CSV, review and edit the query in step 2 before clicking Run.
What is the difference between Load CSV and Cypher batch?
Load CSV uploads tabular data and builds a query around LOAD CSV. Cypher batch executes statements from an uploaded script file sequentially.