

Before you begin
- Sign up for a FalkorDB Cloud account.
- For a paid tier, add a payment method.
- For a private Enterprise deployment, create a customer network first.
Create the instance
1
Open the create form
In the sidebar, open Deployments > Instances and select Create. The Create Deployment Instance form opens.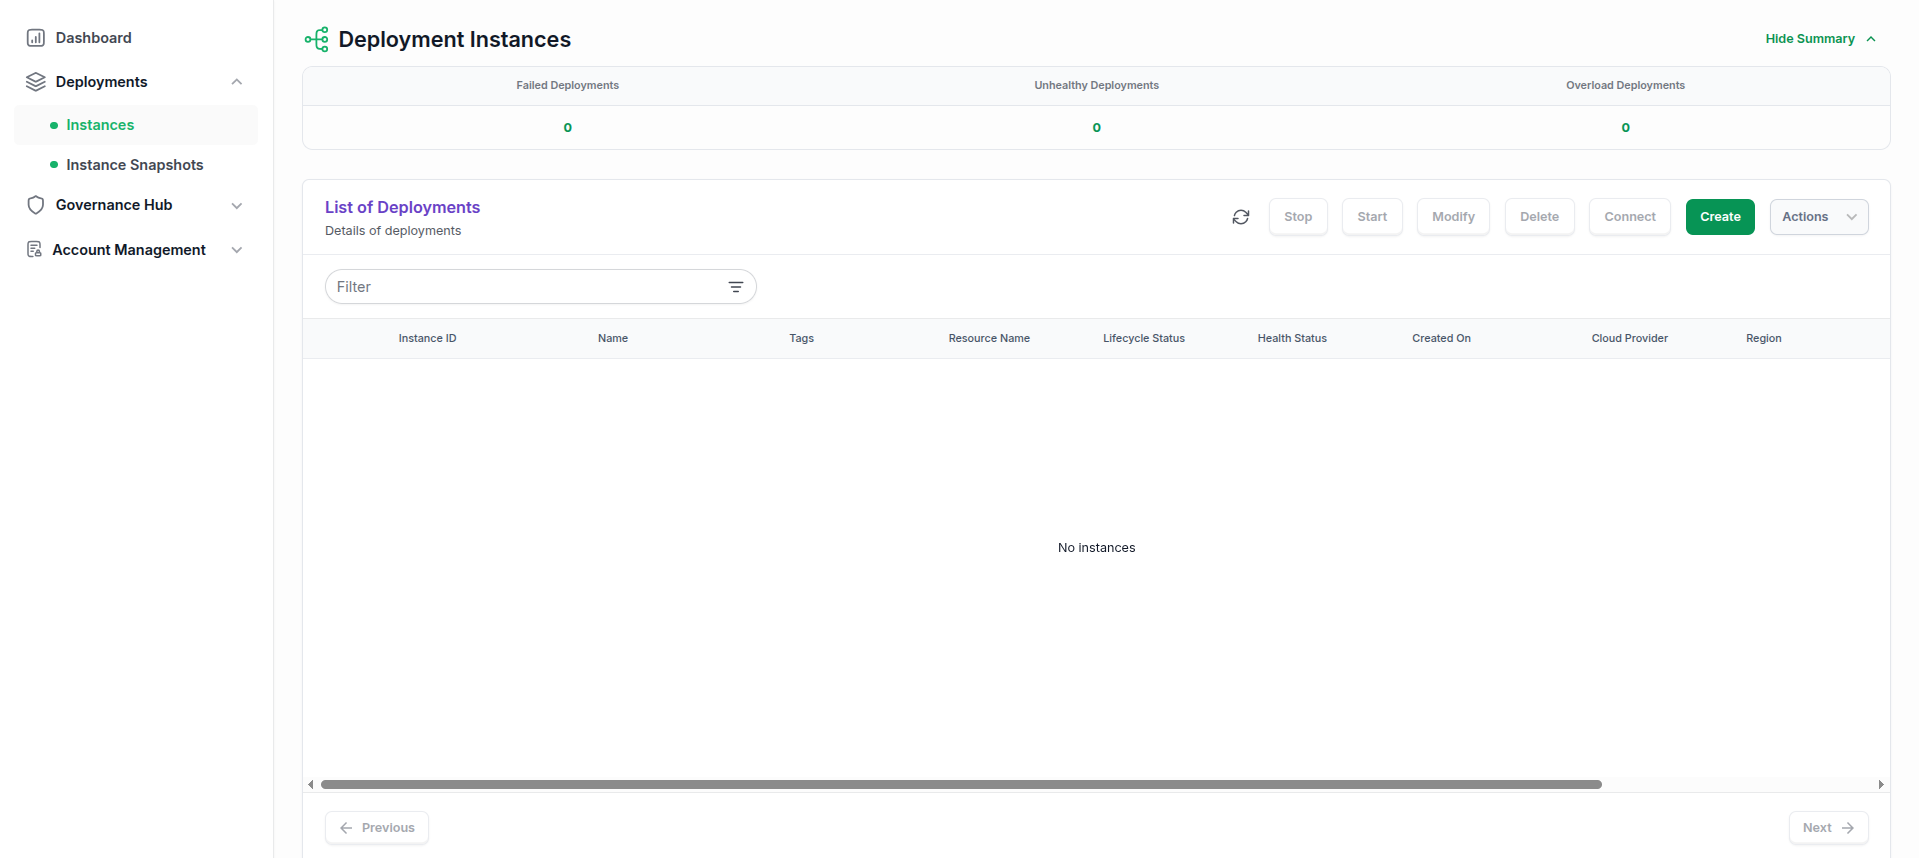
2
Choose a plan
Under Subscription Plan, choose a tier: FalkorDB Free, FalkorDB Startup, FalkorDB Pro, FalkorDB Enterprise, or FalkorDB Enterprise BYOA. If you haven’t subscribed to the plan yet, select Subscribe on its card.If you have more than one subscription to the plan, pick one under Subscription.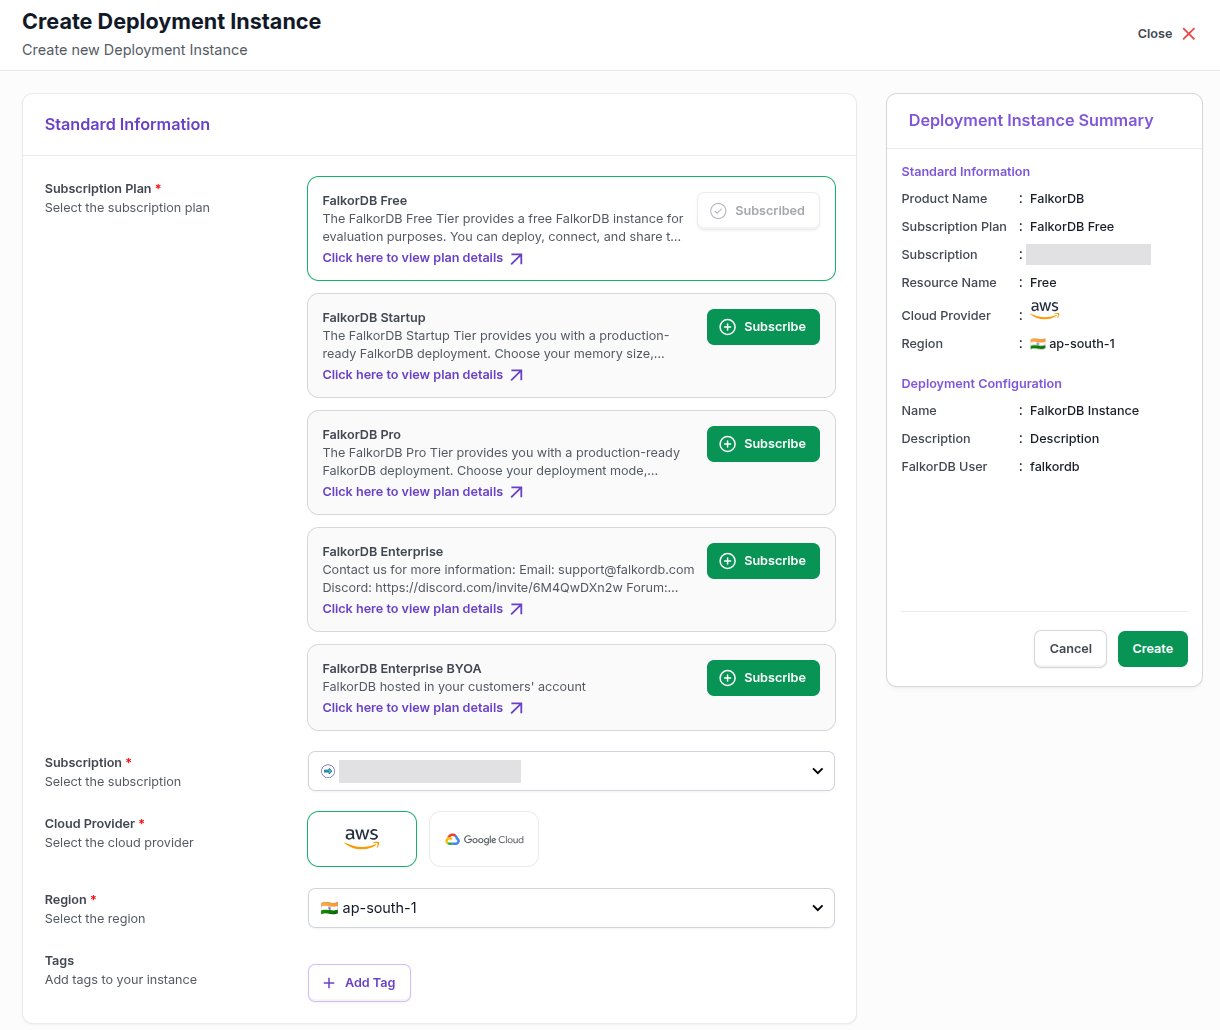
3
Choose a deployment type
Under Resource Name, choose how the instance is deployed. The list shows only the types your tier supports. Free and Startup instances are always Standalone, so the field doesn’t appear for them.
You can’t change the deployment type later. To move to another type, create a new instance and import your data.
4
Choose a cloud provider and region
Select the Cloud Provider logo, then choose a Region. Free, Startup, and Pro run on AWS or GCP. Hosted Enterprise adds Azure. Enterprise BYOA runs in your own AWS account. Pick the region closest to your application to keep latency low.
5
Choose the network (Enterprise)
On hosted Enterprise plans, a Network Configuration card appears. Other plans don’t show it, because their instances always use a public endpoint.
- Public gives the instance a public endpoint.
- Private places it in a customer network. Choose the network under Customer Network ID.
6
Configure the database
Under Deployment Configuration, fill in: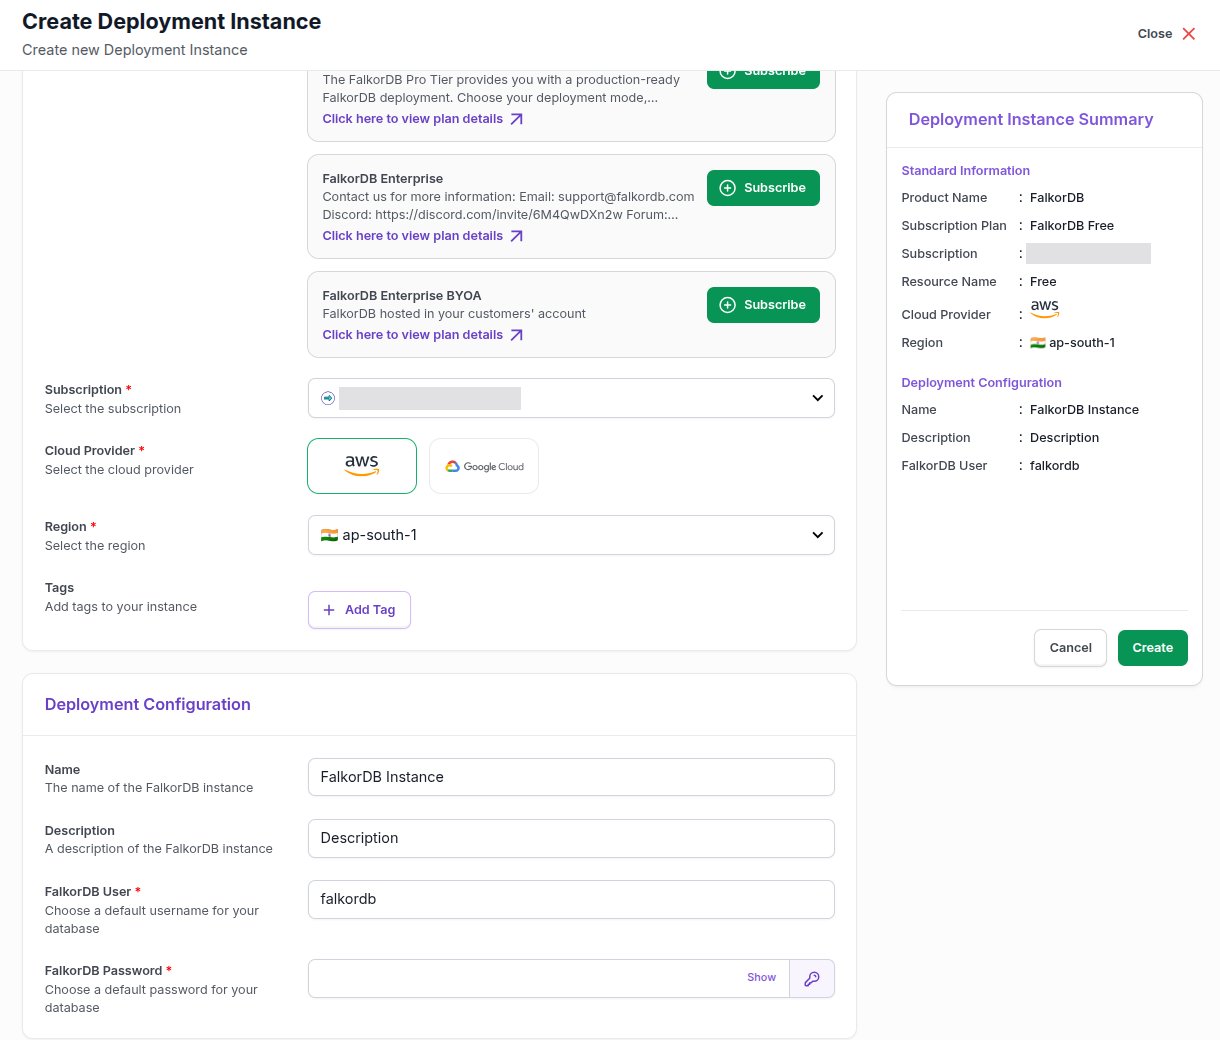
- Name and Description: help you find the instance later.
- FalkorDB User: the default username. It’s set to
falkordb. - FalkorDB Password: the password for the default user. Use at least 6 characters.
- Memory or instance size: how much RAM the instance has. See your tier page for sizes and prices.
- Enable TLS: encrypts connections to the instance. You can’t change this after the instance is created.
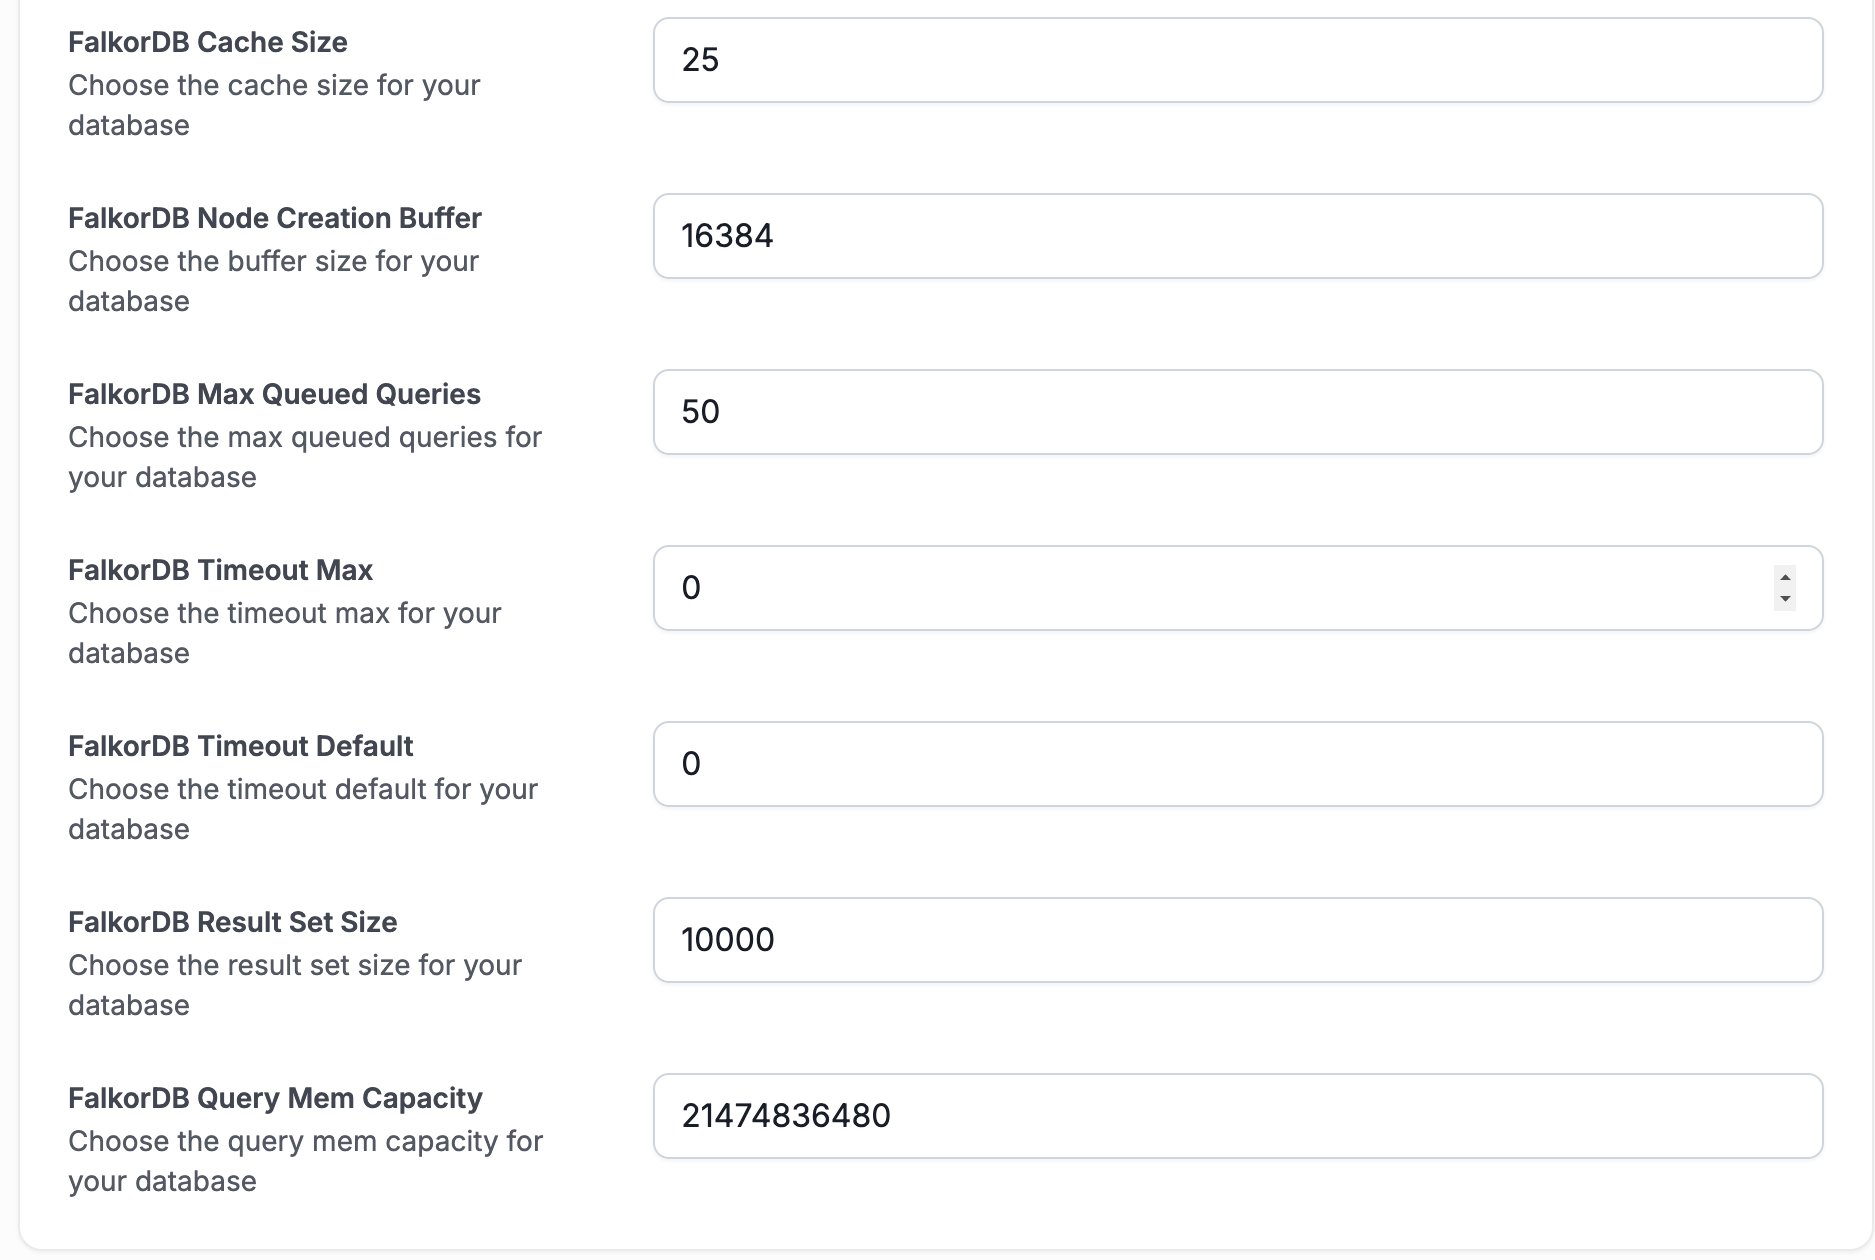
- Persistence and FalkorDB tuning options, such as FalkorDB Cache Size and FalkorDB Result Set Size. Their defaults work for most workloads.
7
Create
Check the Deployment Instance Summary panel and select Create.The Launching Your Instance dialog shows the new Instance ID and its Lifecycle Status. Most instances are ready within a few minutes.
Check the status
Your instance appears in the Instances list with the Lifecycle Status Deploying. Wait until it’s Running, then connect to it. While the instance deploys, its Health Status can show Unhealthy. That’s expected. Select the instance name to open its detail page. The tabs on that page include:Change, stop, or delete an instance
From the Instances list, select the instance and use the toolbar:- Modify changes the name, description, or FalkorDB password. On the Startup, Pro, and Enterprise tiers it can also change the instance size. See Upgrading instances.
- Stop and Start pause and resume the instance. On paid tiers, an instance that stays stopped is removed after 14 days. Free instances are stopped after 1 day without use and deleted after 7 days. See your tier page for details.
- Delete removes the instance. Type
deletemeto confirm. On paid tiers, you can choose Take final snapshot before deletion to keep a copy of the data.